BHW Group Blog
AngularJS and HTML Form Design - Part 1
Submitted by Clayton Anderson on Monday, 08/11/14
Introduction
One of the greatest benefits we have seen when creating single page applications with AngularJS is how much faster and easier it is to design forms, even those with complex validation.
This will be a multi-part series covering all the best practices we have picked up when designing HTML forms. Part 1 will provide step by step instructions for building a simple and user-friendly contact information form with AngularJS. In part 2 we will dig deeper into some of the more complex validation and form logic.
This series assumes some level of AngularJS familiarity, but is intended for novices and veterans alike. I will be including links to the concepts that might be unfamiliar to beginners. Let's begin!
Step 1. The Building Blocks
I always like starting with the data when I begin coding a new feature, so let's define what our contact object will look like.
{
    firstName: '',
    lastName: '',
    email: ''
}
That's a pretty simple object. We are going to start small and add more properties in part 2.
Next, we create an AngularJS factory for saving contacts to a data store. For this article we aren't particularly concerned with a backend implementation, so our factory will just delay for a moment before resolving.
(function() {
    'use strict';

    var module = angular.module('form-demo');

    function ContactFactory($q, $timeout) {
        return {
            save: function(contact) {
                var deferred = $q.defer();
                $timeout(deferred.resolve, 1000);
                return deferred.promise;
            }
        };
    }

    module.factory('Contact', ['$q', '$timeout', ContactFactory]);
}());
A couple things to note about our factory:
- If you're more comfortable with the AngularJS service syntax, feel free to use a service instead of a factory. They both accomplish the same thing.
- Our save function returns a promise. If promises are new to you, or you aren't using them in your AngularJS projects, I would recommend checking out the $q documentation.
- We are using the minification-friendly form of dependency injection. If you aren't familiar with this, you can read about it at the AngularJS documentation. Just scroll down to the "A Note on Minification" section.
Now we can create our controller.
(function() {
    'use strict';

    var module = angular.module('form-demo');

    function ContactController($scope, $window, Contact) {
        function success() {
            $window.alert('Contact saved successfully!');
        }

        function failure() {
            $window.alert('Oops!');
        }

        $scope.newContact = {};

        $scope.submit = function() {
            Contact.save($scope.newContact)
                .then(success, failure);
        };
    }

    module.controller('ContactController', ['$scope', '$window', 'Contact', ContactController]);
}());
The controller is pretty straightforward. We publish our newContact object to the scope, along with a submit function that will pass along the contact to our factory. For after the factory save resolves, we define callbacks for success or failure.
On to the HTML!
<!DOCTYPE html>
<html lang="en" ng-app="form-demo">
    <head>
        <title>Form Demo</title>
    </head>
    <body ng-controller="ContactController">
        <form ng-submit="submit()">
            <div>
                <label>
                    First Name
                    <input type="text" ng-model="newContact.firstName" />
                </label>
            </div>

            <div>
                <label>
                    Last Name
                    <input type="text" ng-model="newContact.lastName" />
                </label>
            </div>

            <div>
                <label>
                    Email
                    <input type="email" ng-model="newContact.email" />
                </label>
            </div>

            <div>
                <button type="submit">Submit</button>
            </div>
        </form>

        <script src="https://ajax.googleapis.com/ajax/libs/angularjs/1.2.21/angular.js"></script>
        <script>
            angular.module('form-demo', []);
        </script>
        <script src="contact-service.js"></script>
        <script src="contact-controller.js"></script>
    </body>
</html>
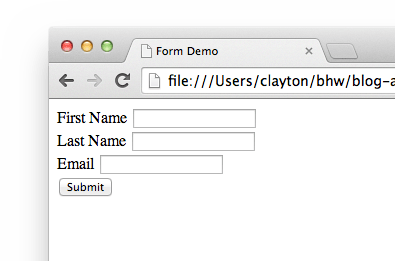
The HTML is mostly AngularJS boilerplate, but do notice the ng-submit attribute on the form element. If we had put an ng-click on the submit button instead, the form wouldn't submit if the user pressed the enter key while focusing an input. With ng-submit on the form you provide a nicer user experience.
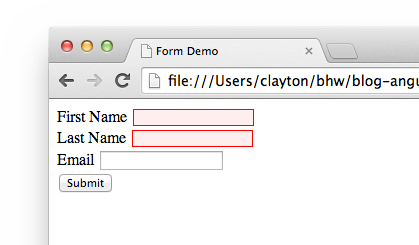
If you're following along, you should be able to pull up the demo page and try it out.
Submitting the form will trigger a success message, after a one second delay.
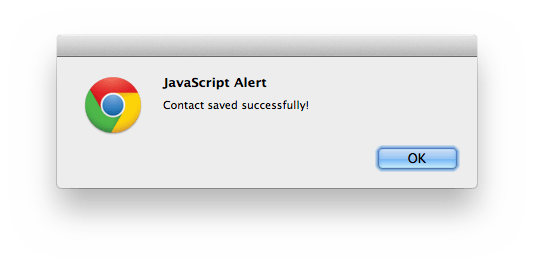
Progress! There is a lot missing though. We haven't provided any validation yet, there is no indication that the form is submitting, and it doesn't prevent the user from submitting multiple times in quick succession. Fortunately, AngularJS will make adding each piece easy.
Step 2. AngularJS Validation
Depending on your browser and what you entered in the form, you may see something like this when you submit.
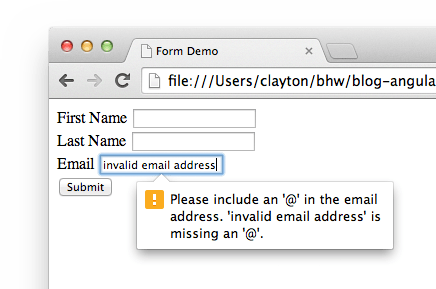
Some browsers include built-in form validation. In my screenshot, I entered an invalid email address so Chrome prevented the submit from firing. We want to use our own validation logic through AngularJS, so that the user experience is consistent across all browsers. HTML5 makes disabling the browser validation easy.
...
<form ng-submit="submit()" novalidate>
    ...
</form>
...
Adding the novalidate attribute to the form will prevent the browser from using built-in validation.
Before validation will work, we need to make another HTML change. In AngularJS, if you add a name to a form, that instance of FormController will be published on the scope. Once the form instance is on the scope, we can check for validity in our submit handler before sending the contact to the data store.
...
<form ng-submit="submit()" name="contactForm" novalidate>
    ...
</form>
...
The form can now be accessed inside the controller through $scope.contactForm.
...
$scope.submit = function() {
if ($scope.contactForm.$valid) {
Contact.save($scope.newContact)
.then(success, failure);
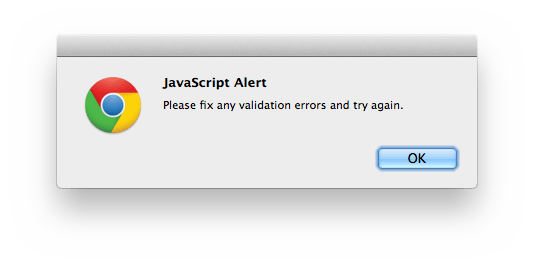
} else {
$window.alert('Please fix any validation errors and try again.');
}
};
...
If you try submitting the form now with an invalid email, you should see an alert asking you to fix any validation errors and submit again. You might be wondering how AngularJS knows the form is invalid when we haven't added any validation rules yet. It turns out AngularJS looks at the types of your inputs and includes some rules automatically, so just from specifying type="email" we already have some working validation.
Let's add a few more validation rules to the form.
...
<div>
    <label>
        First Name
        <input type="text" ng-model="newContact.firstName" required ng-maxlength="20" />
    </label>
</div>

<div>
    <label>
        Last Name
        <input type="text" ng-model="newContact.lastName" required ng-maxlength="20" />
    </label>
</div>
...
We've made the first and last name fields required, with a maximum length of 20. The $scope.contactForm.$valid property that we used earlier will automatically reflect the state of all validation rules in the form, even as we add new rules. Submitting with an invalid first or last name will result in the same message as for the email address.
Our form is coming along nicely, but the user experience could still be greatly improved. Right now, the user has no way of knowing what fields are invalid, and doesn't receive any feedback until they submit the form.
Step 3. Validation Messages and Styling
As a user, one of the most frustrating experiences with a form is when the page says there is a validation error, but won't say what fields have errors. It has become common practice to highlight invalid fields, usually in red. AngularJS makes this really easy, by automatically applying classes to an input based on their validity. The two most important are ng-valid and ng-invalid. With a little bit of CSS, our form is suddenly much friendlier!
input.ng-invalid {
    border: 1px solid #f00;
    background-color: #fee;
}
Let's add some messages now to tell the user exactly what their validation errors are, so they don't have to guess what's wrong.
Recall that after we put a name on the form element, the form instance was published on the scope. Similarly, if we add names to the inputs, we'll be able to check the validity of each rule for each input.
First, add the names.
...
<input type="text" name="firstName" ng-model="newContact.firstName" required ng-maxlength="20" />
...
<input type="text" name="lastName" ng-model="newContact.lastName" required ng-maxlength="20" />
...
<input type="email" name="email" ng-model="newContact.email" />
...
We can now check the validity of each rule with $scope.contactForm.inputName.$error. For example, if we want to check the errors on the firstName field we use this statement.
$scope.contactForm.firstName.$error
Which will reference an object similar to this one.
{
    required: true,
    maxlength: false
}
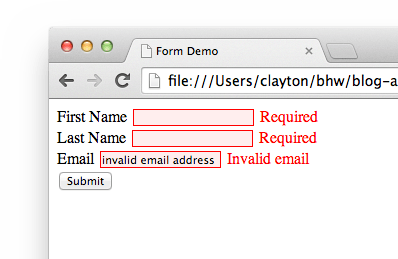
This is an example of what is so great about AngularJS. These fields are automatically updated by the framework, so we just have to watch them in our view. We can be far more declarative with our validation code than with something like jQuery Validate. Here's how to add error messages to the form. No code changes needed!
...
<div>
    <label>
        First Name
        <input type="text" name="firstName" ng-model="newContact.firstName" required ng-maxlength="20" />
        <span class="validation-message" ng-show="contactForm.firstName.$error.required">Required</span>
        <span class="validation-message" ng-show="contactForm.firstName.$error.maxlength">Max length 20</span>
    </label>
</div>

<div>
    <label>
        Last Name
        <input type="text" name="lastName" ng-model="newContact.lastName" required ng-maxlength="20" />
        <span class="validation-message" ng-show="contactForm.lastName.$error.required">Required</span>
        <span class="validation-message" ng-show="contactForm.lastName.$error.maxlength">Max length 20</span>
    </label>
</div>

<div>
    <label>
        Email
        <input type="email" name="email" ng-model="newContact.email" />
        <span class="validation-message" ng-show="contactForm.email.$error.email">Invalid email</span>
    </label>
</div>
...
And a quick style addition to go with it.
...
.validation-message {
    color: #f00;
}
We're getting close! In the next section we'll make some more usability improvements.
Step 4. Form Submission Tracking
Although our form does a good job of informing the user of errors, it looks a little scary for a new user to open a form for the first time and see error messages before even typing anything. It is a common practice to wait to show validation error messages and styles until after the user has attempted to submit the form.
Let's add a submitted boolean to our controller to track whether the user has attempted to submit the form.
...
$scope.submitted = false;

$scope.submit = function() {
    $scope.submitted = true;

    if ($scope.contactForm.$valid) {
        Contact.save($scope.newContact)
            .then(success, failure);
    } else {
        $window.alert('Please fix any validation errors and try again.');
    }
};
...
Now we can conditionally apply a submitted class to our form with the ng-class directive.
...
<form ng-submit="submit()" ng-class="{ submitted: submitted }" name="contactForm" novalidate>
   ...
</form>
...
There are a few different ways to use ng-class, but here we are using it with an object. The way that ng-class works with an object is that for each key-value pair in the object, if the value is truthy, then the key is added as a class to the element. So on our form, if the submitted boolean that we just added to the controller is true, then the form will have a submitted class added to it. If the submitted boolean is false, then the class will be removed.
If you're interested in reading more about the different ways to use ng-class, you can find that at the AngularJS documentation.
Next, we add a check for the submitted boolean in our validation message ng-show conditions.
...
<span class="validation-message" ng-show="submitted && contactForm.firstName.$error.required">Required</span>
<span class="validation-message" ng-show="submitted && contactForm.firstName.$error.maxlength">Max length 20</span>
...
<span class="validation-message" ng-show="submitted && contactForm.lastName.$error.required">Required</span>
<span class="validation-message" ng-show="submitted && contactForm.lastName.$error.maxlength">Max length 20</span>
...
<span class="validation-message" ng-show="submitted && contactForm.email.$error.email">Invalid email</span>
...
And with a quick style change, our form now waits to show errors until after the user has attempted to submit.
.submitted input.ng-invalid {
    border: 1px solid #f00;
    background-color: #fee;
}
There's one major piece of good form design we haven't gotten to yet. Right now, our form doesn't provide any indication that it is submitting, and it doesn't prevent multiple submits.
Let's add another boolean to our controller, this time to track whether the form is currently submitting. We'll call it submitting.
...
$scope.submitted = false;
$scope.submitting = false;

$scope.submit = function() {
    $scope.submitted = true;

    if ($scope.contactForm.$valid) {
        $scope.submitting = true;
        Contact.save($scope.newContact)
            .then(success, failure)
            .then(function() {
                $scope.submitting = false;
            });
    } else {
        $window.alert('Please fix any validation errors and try again.');
    }
};
...
Nothing too complicated here, we just set the submitting boolean to true when we hand things off to our save function. After the save promise resolves, we then set it back to false.
(As an aside, if you haven't used promise chains before and are interested in learning more, be sure to watch this excellent egghead.io video.)
With a small change to our button, we have our desired functionality!
...
<button type="submit" ng-disabled="submitting" ng-switch="submitting">
    <span ng-switch-default>Submit</span>
    <span ng-switch-when="true">Submitting...</span>
</button>
...
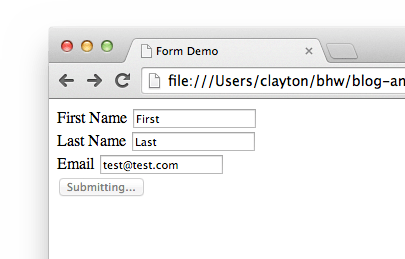
Our button is now disabled while the form submits thanks to ng-disabled, and it changes text thanks to ng-switch. Feel free to use a spinner instead of text while submitting.
Conclusion
It's simple, but I think our form is working pretty nicely. If you want to keep working on it you could add some more styles or hook up the factory to a real data store.
This wraps up part 1 - keep an eye out for part 2, where we will delve into some more complicated form logic!
Do you need an expert in web development? With a team of web development specialists covering a wide range of skill sets and backgrounds, The BHW Group is prepared to help your company make the transformations needed to remain competitive in today’s high-tech marketplace.